Tag: Recipes

Sweet Potato Grilled Cheese Sandwich

The classic grilled cheese is a childhood favorite and a warm and comforting lunch staple. But what if we told you there was a way to elevate this timeless dish, to infuse it with unexpected flavor and vibrant color? Enter the Sweet Potato Grilled Cheese—a symphony of sweet and savory that will tantalize your taste buds.

Why Sweet Potato Grilled Cheese?

  • Flavor Fusion: Sweet potato adds a delightful sweetness and creamy texture that beautifully complements your favorite cheese. It’s a flavor adventure in every bite!
  • Nutritional Upgrade: Sweet potatoes are packed with vitamins, fiber, and beta-carotene, making this grilled cheese a more nutritious alternative to the classic.
  • Visually Stunning: The vibrant orange of the sweet potato creates a visually stunning sandwich, perfect for impressing yourself or your lunch date.

Ingredients (makes 1 serving):

  • The Bread:
    • 2 slices of your favorite bread (sourdough, wheat, or even a buttery brioche works well)
  • The Star of the Show:
    • 1/2 medium sweet potato, thinly sliced (about 1/4 inch thick)
  • The Melty Magic:
    • 2-3 slices of your favorite cheese (cheddar, Gruyere, goat cheese, or a combination are all delicious options)
  • Flavor Boosters (Optional):
    • 1 tablespoon butter or mayonnaise (for spreading)
    • 1/4 teaspoon dried thyme
    • Pinch of salt and pepper

Instructions:

  1. Sweet Potato Prep: Wash and peel your sweet potato. Using a sharp knife or mandoline slicer (if you have one), cut the sweet potato into thin slices.
  2. Spice It Up (Optional): In a bowl, toss the sweet potato slices with dried thyme, salt, and pepper.
  3. Butter Up: Spread your chosen fat (butter or mayonnaise) on one side of each bread slice.
  4. Cheese Heaven: Place half the cheese slices on the unbuttered side of one bread slice. Layer the sweet potato slices on top of the cheese. Top with the remaining cheese slices.
  5. Griddle Time: Heat a griddle or large skillet over medium heat. Carefully place the sandwich on the griddle. Cook for 2-3 minutes per side, or until the bread is golden brown and crispy, and the cheese is melted and gooey.
  6. Savor the Sweetness: Once cooked through, carefully transfer the sandwich to a plate and cut it in half. Take a moment to admire the beautiful golden brown exterior and vibrant orange filling before digging in!

Tips & Tricks:

  • Want extra melty cheese? Pre-shred your cheese for even melting throughout the sandwich.
  • Don’t have a griddle? No problem! You can use a frying pan with a little bit of butter or oil.
  • Feeling adventurous? Add a drizzle of balsamic reduction or a smear of pesto to the bread for an extra flavor explosion.

So ditch the ordinary and embrace the extraordinary! The Sweet Potato Grilled Cheese is a delightful twist on a classic, a culinary adventure for your taste buds.

Protein-Packed Lemon-Blueberry Energy Bites

Feeling that 3 pm slump creeping in? Ditch the sugary snacks and reach for a delicious and energizing alternative – High-Protein Lemon-Blueberry Energy Balls! These bite-sized powerhouses are packed with protein, healthy fats, and the vibrant flavors of lemon and blueberry, making them the perfect pick-me-up for busy days.

Why High-Protein Lemon-Blueberry Energy Balls?

  • Protein Power: Packed with protein from ingredients like nuts and seeds, these energy balls keep you feeling fuller for longer, combating cravings and afternoon fatigue.
  • Natural Energy Boost: The combination of healthy fats, complex carbohydrates, and a touch of natural sweetness provides sustained energy without the jitters often associated with sugary snacks.
  • Flavor Explosion: The bright citrus zest of lemon beautifully complements the sweet and juicy blueberries, creating a refreshing and satisfying taste experience.

Ingredients (makes about 12 balls):

  • Dry Ingredients:
    • 1 cup rolled oats
    • ½ cup raw almonds or cashews
    • ¼ cup unsweetened shredded coconut
    • ¼ cup chia seeds
    • 1 scoop vanilla protein powder (optional)
  • Wet Ingredients:
    • ½ cup dried blueberries
    • ¼ cup pitted Medjool dates
    • 2 tablespoons nut butter (almond butter, peanut butter, etc.)
    • 1 tablespoon lemon juice
    • 1 tablespoon melted coconut oil (or vegetable oil)
    • Zest of 1 lemon

Instructions:

  1. Food Processor Fiesta: In a food processor, combine the rolled oats, almonds/cashews, shredded coconut, chia seeds, and protein powder (if using). Pulse a few times to create a coarse crumb.
  2. Sticky Situation: Add the dried blueberries, dates, nut butter, lemon juice, melted coconut oil, and lemon zest to the food processor. Process until the mixture becomes sticky and begins to clump together.
  3. Ballin’: Using a spoon, scoop out the mixture and roll it into bite-sized balls with your hands.
  4. Chill Out (Optional): For a firmer texture, place the energy balls in the refrigerator or freezer for 15-20 minutes before enjoying.

Tips & Tricks:

  • Don’t have Medjool dates? Other dried fruits like raisins or cranberries can be used instead.
  • Want a chewier texture? Add a tablespoon of honey or maple syrup to the wet ingredients.
  • For extra protein and healthy fats, add a tablespoon of hemp seeds or flaxseed meal to the dry ingredients.
  • These energy balls store well in an airtight container in the refrigerator for up to a week, or in the freezer for longer storage.

So ditch the sugary snacks and fuel your body with goodness! Whip up a batch of these High-Protein Lemon-Blueberry Energy Balls and experience a delicious and energizing way to conquer your day.

Carrot Cake-Inspired Oatmeal Bars

Calling all carrot cake lovers and oatmeal enthusiasts! This recipe combines your favorite things into one delectable treat: Carrot Cake Oatmeal Bars! These wholesome bars are packed with warming spices, juicy carrots, and the comforting goodness of oats, making them the perfect guilt-free snack or breakfast on the go.

Why Carrot Cake Oatmeal Bars?

  • Flavor Explosion: Bursting with cinnamon, ginger, and nutmeg, these bars capture the essence of carrot cake in a convenient and portable form.
  • Oatmeal Advantage: Oats provide a source of fiber and keep you feeling fuller for longer, making these bars a satisfying snack choice.
  • Healthy Indulgence: Carrots’ natural sweetness, combined with a touch of honey or maple syrup, creates a delicious treat without refined sugar overload.

Ingredients (makes about 12 bars):

  • Dry Ingredients:
    • 1 ½ cups rolled oats
    • ½ cup old-fashioned oats (not quick oats)
    • ½ cup whole wheat flour
    • 1 teaspoon baking powder
    • 1 teaspoon ground cinnamon
    • ½ teaspoon ground ginger
    • ¼ teaspoon ground nutmeg
    • ½ teaspoon salt
  • Wet Ingredients:
    • 1 cup grated carrots (about 2 medium carrots)
    • ¼ cup melted coconut oil (or vegetable oil)
    • ¼ cup honey or maple syrup
    • 1 large egg, beaten
    • ½ teaspoon vanilla extract
    • ¼ cup chopped walnuts or pecans (optional)

Instructions:

  1. Oatmeal Oasis: Preheat your oven to 375°F (190°C) and line an 8×8 inch baking pan with parchment paper.
  2. Dry Mix Magic: In a large bowl, whisk together the rolled oats, old-fashioned oats, flour, baking powder, spices, and salt.
  3. Wet Wonderland: In a separate bowl, combine the grated carrots, melted coconut oil, honey, egg, and vanilla extract. Mix well.
  4. Unite the Crews: Pour the wet ingredients into the dry ingredients and fold everything together until just combined. Gently stir in the chopped nuts, if using.
  5. Baking Bonanza: Spread the batter evenly into the prepared baking pan. Bake for 20-25 minutes, or until a toothpick inserted into the center comes out clean.
  6. Cooling Castle: Let the bars cool completely in the pan before cutting them into squares.

Tips & Tricks:

  • For a sweeter bar, add a few extra tablespoons of honey or maple syrup.
  • Want some extra moisture? Add ½ cup of shredded apple or mashed banana to the batter.
  • Don’t have nuts? No problem! Dried fruit like raisins or cranberries can be used instead.
  • These bars store well in an airtight container at room temperature for up to 3 days, or in the freezer for longer storage.

Ditch the boring snacks and embrace the taste of carrot cake in a healthy and satisfying way! Whip up a batch of these Carrot Cake Oatmeal Bars and enjoy a delicious treat that nourishes your body and soul.

Make Crispy Potato Peel Chips with Just 3 Ingredients

We’ve all been there: Peeling potatoes for dinner and tossing the scraps without a second thought. But hold on! Those seemingly ordinary potato peels hold the potential for a delicious and healthy snack – Crispy Potato Peel Chips!

This recipe is a game-changer for frugal foodies and anyone who loves a satisfying crunch. With just 3 ingredients and minimal effort, you can transform leftover potato peels into a guilt-free treat.

Why Potato Peel Chips?

  • Frugal Magic: Don’t waste a single potato part! Turn those peels into crispy chips, minimizing food waste and maximizing your grocery budget.
  • Surprisingly Delicious: Potato peels, when seasoned right, become addictive little flavor bombs. They’re naturally salty and can be customized with your favorite spices.
  • Healthy Snacking: These chips are a healthier alternative to store-bought options. They’re lower in fat and calories, and contain fiber from the potato skin.

Ingredients (makes 2-3 servings):

  • Potato peels from 2-3 large potatoes (washed)
  • 1 tablespoon olive oil
  • 1/2 teaspoon salt (or to taste)
  • Optional seasonings: garlic powder, paprika, dried herbs

Instructions:

  1. Peel Power: Wash your potatoes and peel them, saving the peels in a bowl.
  2. Drying Mission: Spread the potato peels on a clean kitchen towel and pat them dry to remove excess moisture. Crispy chips require dry peels!
  3. Seasoning Symphony: In a large bowl, toss the dried potato peels with olive oil and your chosen seasonings. Salt is essential, but feel free to experiment with garlic powder, paprika, or dried herbs like rosemary or thyme.
  4. Crispy Canvas: Preheat your oven to 400°F (200°C). Line a baking sheet with parchment paper and spread the seasoned potato peels in a single layer.
  5. Baking Bonanza: Bake the potato peels for 15-20 minutes, or until golden brown and crispy. Keep an eye on them – they can burn easily!
  6. Snack Attack! Let the chips cool slightly before digging in. Enjoy them plain, or with your favorite dip like hummus or guacamole.

Tips & Tricks:

  • Use a mandoline slicer for uniformly thin peels, which will cook more evenly.
  • Don’t overcrowd the baking sheet – this ensures even crisping.
  • Leftover chips can be stored in an airtight container for up to 2 days.

So next time you peel your potatoes, don’t throw those peels away! With a little creativity and this simple recipe, you can create a delicious and satisfying snack that’s easy on your wallet and waistline. Ditch the processed snacks and embrace the power of the potato peel!

Brussels Sprouts Caesar Salad Twist

Caesar salad: the dependable dish, the lunchtime go-to. But what if we told you there was a way to elevate this classic, to infuse it with vibrancy and intrigue? Enter the Brussels Sprouts Caesar Salad – a flavor explosion waiting to happen!

This isn’t your average salad makeover. We’re not talking limp lettuce and soggy croutons. This recipe is a textural symphony, a party on your palate. The creamy Caesar dressing you know and love gets a bold new partner: the mighty Brussels sprout.

Why Brussels Sprouts Caesar Salad?

  • Texture Tango: Roasted Brussels sprouts add a delightful crunch, a satisfying counterpoint to the creamy dressing and crisp romaine. Shaved raw, they offer a peppery bite, a welcome surprise with every mouthful.
  • Nutrient Ninja: Brussels sprouts are little nutritional powerhouses, packed with vitamins, minerals, and fiber. This salad isn’t just delicious; it’s good for you, too!
  • Caesar with a Kick: This recipe keeps the classic Caesar elements—the creamy dressing and the salty Parmesan—but adds a touch of excitement with the Brussels sprouts. It’s familiar yet refreshingly different.

Ingredients (for 2 servings):

  • Salad Sensations:
    • 4 cups chopped romaine lettuce
    • 1 cup Brussels sprouts (trimmed and thinly sliced or halved and roasted)
    • 1/2 cup cherry tomatoes, halved
    • 1/4 cup grated Parmesan cheese
    • Croutons (optional)
  • Caesar Symphony:
    • 2 tablespoons mayonnaise
    • 1 tablespoon lemon juice
    • 1 tablespoon olive oil
    • 1 anchovy fillet (optional, for a deeper umami flavor)
    • 1 clove garlic, minced
    • 1/2 teaspoon Dijon mustard
    • 1/4 teaspoon Worcestershire sauce
    • Freshly ground black pepper to taste

Instructions:

  1. Dressing Diva: In a blender or food processor, combine all dressing ingredients (except black pepper). Blend until smooth and creamy. Season with black pepper to taste.
  2. Brussels Sprout Bonanza:
    • Roasted Route: Preheat oven to 400°F (200°C). Toss Brussels sprouts with olive oil, salt, and pepper. Roast for 15-20 minutes, or until tender and slightly browned.
    • Shaved Simplicity: Using a sharp knife or mandoline slicer, thinly slice the Brussels sprouts.
  3. Salad Soiree: In a large bowl, combine romaine lettuce, Brussels sprouts, cherry tomatoes, and Parmesan cheese. Toss with the Caesar dressing to coat.
  4. Crunch Time (Optional): Top your salad with croutons for an extra textural element.

Tips & Tricks:

  • Feeling adventurous? Add other roasted vegetables like red onion or butternut squash for extra flavor and variety.
  • Don’t have anchovies? No worries! The dressing will still be delicious.
  • Leftover roasted Brussels sprouts? Use them in other dishes throughout the week!

This Brussels Sprouts Caesar Salad is a revelation. It’s a celebration of flavor and texture, a salad that’s more than just a side dish. So ditch the boring and embrace the bold! Your taste buds will thank you.

Weeknight Wonder: Lemon-Garlic Salmon Bites

Looking for a fuss-free, flavor-packed meal that’s ready in under 30 minutes? Look no further than Lemon-Garlic Salmon Bites! These bite-sized wonders are perfect for a quick and satisfying weeknight dinner, or even an impressive appetizer for a casual get-together.

Why Lemon-Garlic Salmon Bites?

  • Easy & Quick: This recipe requires minimal prep and cooks up in a flash, making it ideal for busy weeknights.
  • Flavor Explosion: The combination of zesty lemon, fragrant garlic, and savory spices creates a flavor profile that will tantalize your taste buds.
  • Healthy & Nutritious: Salmon is a fantastic source of lean protein, healthy fats, and essential vitamins.

Ingredients (for 2 servings):

  • 1 pound salmon fillet, skinless and cut into 1-inch cubes
  • 1 tablespoon olive oil
  • 1 tablespoon freshly squeezed lemon juice
  • 1 teaspoon grated garlic
  • 1/2 teaspoon dried oregano
  • 1/4 teaspoon paprika
  • 1/4 teaspoon salt
  • 1/4 teaspoon black pepper
  • Fresh parsley, chopped (optional, for garnish)

Instructions:

  1. Marinate the Magic: In a bowl, combine olive oil, lemon juice, garlic, oregano, paprika, salt, and pepper. Toss the salmon cubes in the marinade, making sure they’re evenly coated. Let them marinate for at least 15 minutes (or up to 30 minutes for extra flavor).
  2. Cooking Options: Choose your cooking adventure!
    • Pan-Seared Perfection: Heat a skillet over medium-high heat. Add the salmon cubes (discarding any leftover marinade) and cook for 3-4 minutes per side, or until golden brown and cooked through.
    • Baked for Busy Bees: Preheat your oven to 400°F (200°C). Line a baking sheet with parchment paper and spread the salmon cubes in a single layer. Bake for 10-12 minutes, or until cooked through.
  3. Plate & Enjoy: Garnish your delicious Lemon-Garlic Salmon Bites with fresh chopped parsley (optional) and serve with your favorite sides like roasted vegetables, rice, or quinoa.

Tips & Tricks:

  • Want a crispy crust? Pat the salmon cubes dry with paper towels before marinating.
  • Don’t overcook the salmon! It should be opaque but still slightly moist in the center.
  • Leftovers? No problem! Flake the leftover salmon and use it in salads, sandwiches, or pasta dishes.

This Lemon-Garlic Salmon Bites recipe is a weeknight lifesaver. It’s easy to prepare, incredibly flavorful, and packed with nutrition. So ditch the takeout menus and whip up a batch of these delicious bites for a satisfying and healthy meal!

The Kale & Banana Smoothie

Looking for a quick and refreshing way to boost your mornings (or afternoons)? Look no further than the Kale & Banana Smoothie! This powerhouse blend packs a punch of vitamins, minerals, and creamy deliciousness, making it the perfect on-the-go breakfast or a healthy afternoon pick-me-up.

Why Kale & Banana?

  • Kale: This leafy green is a nutritional superstar, loaded with vitamins A, C, and K, as well as fiber and antioxidants. Don’t worry—the strong flavor is mellowed by the other ingredients!
  • Banana: This potassium-rich fruit adds natural sweetness and creaminess to the smoothie, making it a delicious way to sneak in some greens.

Ingredients (makes 1 serving):

  • 1 cup leafy kale, roughly chopped
  • 1 ripe banana, peeled and sliced
  • 1 cup unsweetened plant-based milk (almond, oat, soy, etc.)
  • 1/2 cup water (or more, depending on desired thickness)
  • 1 tablespoon honey or maple syrup (optional, for extra sweetness)
  • Optional additions: a handful of spinach, frozen berries, a scoop of protein powder, pinch of ground cinnamon

Instructions:

Blend it up! Toss all ingredients into your blender and blend until smooth and creamy. Adjust the amount of water or plant-based milk to achieve your desired consistency.

Tips & Tricks:

  • Frozen bananas add a thicker, creamier texture to the smoothie.
  • If you don’t have fresh spinach, a handful of baby kale leaves will work just fine.
  • Feeling adventurous? Add a scoop of your favorite protein powder for an extra protein boost.
  • Don’t like honey or maple syrup? Dates or a squeeze of agave nectar can also add sweetness.

Enjoy!

This Kale & Banana Smoothie is a delicious and nutritious way to start your day or conquer that afternoon slump. So ditch the sugary drinks and blend your way to a healthier, happier you!

Tuna and Cucumber Salad Sandwich with a Twist!

Hey there, lunch-pack warriors and midday mealtime maestros! Are you tired of the same old boring tuna salad sandwich? Do you crave something refreshing, light, yet satisfying? Then buckle up, because today we’re revamping the classic tuna salad with a delightful twist – the Tuna and Cucumber Salad Sandwich Combo!

This recipe is all about taking familiar flavors and presenting them in a new and exciting way. We’ll be crafting a delightful tuna salad with a touch of cucumber crunch, but the real star of the show is our bread situation. We’re ditching the traditional sandwich slices and opting for something a little more fun and interactive – cucumber rounds!

So, are you ready to ditch the dull and embrace the delightful? Let’s get started!

Ingredients:

  • For the Tuna Salad:
    • 1 can (5 oz) tuna in water, flaked
    • 1/2 cup chopped cucumber
    • 1/4 cup chopped red onion
    • 2 tablespoons mayonnaise
    • 1 tablespoon lemon juice
    • 1/2 teaspoon dried dill
    • Salt and pepper to taste
  • For the Sandwich Assembly:
    • 1 large cucumber
    • Lettuce leaves (optional)
    • Cherry tomatoes (optional)
    • Whole wheat crackers (optional)

Instructions:

  1. Tuna Salad Time: In a bowl, combine the flaked tuna, chopped cucumber, red onion, mayonnaise, lemon juice, and dill. Season generously with salt and pepper. Give it a good mix to make sure everything is well combined.
  2. Cucumber Round Creation: Wash and dry your cucumber. Using a sharp knife or a mandoline slicer (if you have one), cut the cucumber into thick slices (about 1/4 inch thick). These will be your “bread” for the sandwich!
  3. Assemble and Conquer! Now comes the fun part! Here are a couple of ways to enjoy your deconstructed tuna salad sandwich:
    • Open-Faced Delight: Place a lettuce leaf (optional) on a plate. Top it with a cucumber round, then spread a generous scoop of your tuna salad on top. Add a cherry tomato or two for some extra color and flavor.
    • Double Decker Dream: Spread a layer of tuna salad on one cucumber round. Top it with another cucumber round and repeat the layering process. This double-decker version is perfect for bigger appetites!
  4. Dipping Duos (Optional): For an extra bit of fun, serve some whole wheat crackers on the side. These can be used for scooping up the tuna salad or adding a crunchy element to each bite.

Tips and Tricks:

  • Want to add a bit more protein? Crumble some cooked bacon or diced cooked chicken into your tuna salad.
  • Don’t have fresh dill? No problem! Try using dried parsley or chives instead.
  • If you don’t have a mandoline slicer, a regular knife will work just fine. Just be careful to cut the cucumber slices as evenly as possible.
  • Feeling fancy? Toast your cucumber rounds in a dry pan for a warm and slightly crispy base for your tuna salad.

There you have it, folks! A lunch option that’s as delicious as it is visually appealing. So ditch the boring and embrace the delightful with this Tuna and Cucumber Salad Sandwich Combo. Let us know in the comments below what unique and yummy ways you like to enjoy your tuna salad!

Farewell to Boring Office Lunches: 4 Cup Soup Recipes to Try

Get ready to upgrade your lunch with a set of simple soups made for preparing meals in advance. These tasty dishes come in mason jars, ideal for taking lunch with you. While store-bought soups are fine sometimes, these recipes, like Spicy Ramen Cup of Noodles and Anti-Inflammatory Eat-the-Rainbow Vegetable Soup, are filled with healthy vegetables and lean protein that store-bought options often don’t have.

Immune-Supporting Creamy Tomato Soup (Pack It for Lunch!)

This simple soup recipe only needs three ingredients, making it perfect for a quick snack or a healthy lunch. Plus, it’s packed with over 20% of the daily value of vitamins A and C, important for a strong immune system. This recipe makes one serving, but you can easily make more for a convenient lunch on the go.

Ingredients:

  • ¾ cup no-salt-added canned tomato puree
  • ¼ cup low-sodium chicken broth
  • 1 tablespoon reduced-fat cream cheese

Directions:

  1. Whisk together the tomatoes, broth, and cream cheese in a large heatproof mug.
  2. Microwave on High, stirring occasionally, until heated through and creamy, about 2 minutes.

Spicy Ramen Noodle Cup Soup Packs 16g Protein

In just 15 minutes, you can make three jars of vegetarian ramen cup soup that you can take with you to work or school. These cup soups not only save time but also give you protein from hard-boiled eggs, keeping you full until your next meal.

Ingredients:

  • 1 ½ tablespoons reduced-sodium vegetable bouillon paste
  • 1 ½ teaspoons white miso
  • 1 ½ teaspoons chili-garlic sauce
  • 1 ½ teaspoons grated ginger
  • ¾ cup shredded carrot
  • ¾ cup sliced shiitake mushrooms
  • 1 ½ cups chopped baby spinach
  • 3 hard-boiled eggs, halved
  • 1 ½ cups cooked ramen noodles
  • 3 tablespoons sliced scallions
  • ¾ teaspoon sesame seeds
  • 3 cups very hot water, divided

Directions:

  1. In each of 3 pint-and-a-half-size canning jars, add 1/2 tablespoon bouillon paste, 1/2 teaspoon miso, 1/2 teaspoon chili-garlic sauce, and 1/2 teaspoon ginger.
  2. In each jar, layer 1/4 cup carrot, 1/4 cup mushrooms, 1/2 cup spinach, 2 egg halves, and 1/2 cup noodles.
  3. Top each with 1 tablespoon scallions and 1/4 teaspoon sesame seeds. Close the jars and refrigerate for up to 3 days.
  4. To prepare one jar, add 1 cup of very hot water to it. Close and shake to mix. Microwave uncovered on high for 2 to 3 minutes until hot. Let stand for 5 minutes before eating.

Anti-Inflammatory Eat-the-Rainbow Vegetable Soup [Meal-Prep Friendly]

This colorful and healthy soup recipe is good for you. It has lots of different colorful veggies, like tomatoes, which have lycopene, a natural substance that might help reduce swelling in your body. You prepare the base of the soup ahead of time and keep it in separate containers. When you’re ready to eat, just add the broth and warm it up in the microwave. If you can’t take vegetable broth with you or don’t have a microwave, you can use low-sodium bouillon instead and add hot water.

Ingredients

  • 2/3 cup tomato sauce without salt
  • 1 1/2 cups frozen lima beans
  • 1 cup matchstick carrots
  • 1 cup chopped yellow bell pepper
  • 1 cup chopped plum tomatoes
  • 1 cup packed chopped spinach
  • 2 1/4 cups reduced-sodium vegetable broth
  • 3/4 teaspoon Italian seasoning, divided
  • 3/4 teaspoon garlic powder, divided
  • 3/4 teaspoon crushed red pepper, divided
  • 3 pinches salt, divided

Directions

  1. Divide the tomato sauce evenly among 3 (1-pint) canning jars or other microwave-safe containers.
  2. Top each jar with 1/2 cup lima beans, and 1/3 cup each of carrots, bell pepper, tomatoes, and spinach.
  3. Cover the jars and refrigerate for up to 3 days.

To prepare 1 jar of soup:

  1. Add 3/4 cup of broth to the jar.
  2. Sprinkle with 1/4 teaspoon each of Italian seasoning, garlic powder, and crushed red pepper, and a pinch of salt.
  3. Microwave the jar, uncovered, on High in 1-minute increments, stirring after each, until the soup is hot and the vegetables are tender, for a total of 4 to 5 minutes.
  4. Let it cool for 5 minutes before serving.

Easy Green Tortellini Soup to Balance Blood Sugar [Make Ahead!]

This green tortellini soup is made ahead of time and stored in separate containers for a quick lunch. Place spinach on top of the pesto to keep the tortellini from getting soggy. When you’re ready to eat, just add broth and heat it in the microwave. This recipe is low in saturated fat, which is important for people with health conditions like diabetes. It also has a good amount of carbs to keep your blood sugar levels stable, which means steady energy levels.

Ingredients:

  • 4 tablespoons basil pesto
  • 2 tablespoons lemon juice
  • 2 cups refrigerated spinach-and-cheese tortellini
  • 1 cup packed chopped spinach
  • 1 cup frozen green peas
  • 1/2 cup scallions
  • 3 cups unsalted vegetable broth, divided

Directions:

  1. Divide the pesto and lemon juice evenly among 4 (1-pint) canning jars or microwave-safe containers; mix well.
  2. Layer each jar with 1/2 cup tortellini, 1/4 cup spinach, 1/4 cup peas, and 2 tablespoons scallions.
  3. Cover the jars and refrigerate for up to 3 days.

To prepare 1 jar of soup:

  1. Add 3/4 cup of broth to the jar.
  2. Microwave the jar, uncovered, on High in 1-minute increments, stirring between each, until the soup is hot and the tortellini is tender, for a total of 4 to 5 minutes.
  3. Let it cool for 5 minutes before serving.

Veggie-Packed Peanut Noodle Cup Soup

This peanut noodle soup is filled with crunchy veggies and tofu. We make the base early so the tofu can soak up the flavor. We use precooked noodles to save time, but you can use any leftover noodles too. If the precooked noodles are sticking, soak them in hot water for a bit to loosen them up.

Ingredients

  • 1/4 cup smooth natural peanut butter
  • 1/4 cup reduced-sodium tamari
  • 2 tablespoons water
  • 1 tablespoon minced garlic
  • 1 tablespoon grated fresh ginger
  • 1 (7-ounce) package precooked Thai noodles
  • 1 cup thinly sliced napa cabbage
  • 1 cup matchstick carrots
  • 1 cup thinly sliced red bell pepper
  • 1 cup diagonally sliced snow peas
  • 1 (8-ounce) block extra-firm tofu, drained and cubed (1/2-inch), divided
  • 3 cups reduced-sodium vegetable broth, divided

Directions

  1. Mix peanut butter, tamari, water, garlic, and ginger in a bowl.
  2. Divide the mixture into 4 jars.
  3. Layer each jar with noodles, cabbage, carrots, bell pepper, snow peas, and tofu.
  4. Cover and refrigerate for up to 4 days.
  5. To make one jar of soup: Add 3/4 cup broth to the jar. Microwave on High in 1-minute increments, stirring between each, until the soup is hot and veggies are tender, about 2 to 3 minutes total. Let cool for 5 minutes.

Quick Overnight Oats Recipes for Busy Mornings

Oats are really good for you. They have fiber, whole grains, and B vitamins. But cooking them takes a while, especially on busy days. Who has time for that?

But don’t worry! There’s a solution: overnight oats. You don’t need to cook them. You just prepare them the night before, and they’re ready to eat in the morning. It’s just as good and healthy as cooked oatmeal.

What Are the Health Benefits of Oats?

Oats are a great way to eat more whole grains. Research says most people don’t eat enough whole grains. A study in the Journal of Nutrition found that only about 15 percent of the grains Americans eat are whole grains. But the U.S. Dietary Guidelines say it should be at least 50 percent.

Oats have fiber, providing 4 grams per ½ cup serving, according to the U.S. Department of Agriculture (USDA). This includes a type of fiber called beta-glucan, which is good for your heart and gut and may help fight inflammation and cancer, as per a review in Frontiers in Nutrition.

How to Make Overnight Oats

All you need to do is soak the oats in any liquid or yogurt and let them sit overnight. You can use any type of oats, like old-fashioned or steel-cut. They’ll soak up the liquid and become soft without cooking. This makes a creamy base for adding fruits, nuts, or other toppings.

You can make overnight oats in jars, which makes them easy to take with you and helps control portions. And it’s super cheap because you don’t need to cook them!

There are tons of ways to make overnight oats tasty. You can add classic fruit and nuts with a little cinnamon or try savory combinations like egg, spinach, and tomatoes. With so many delicious options, overnight oats are a great snack for anyone looking for a healthy way to eat. Give these eight recipes a try for ideas, and then come up with your own favorite combinations!

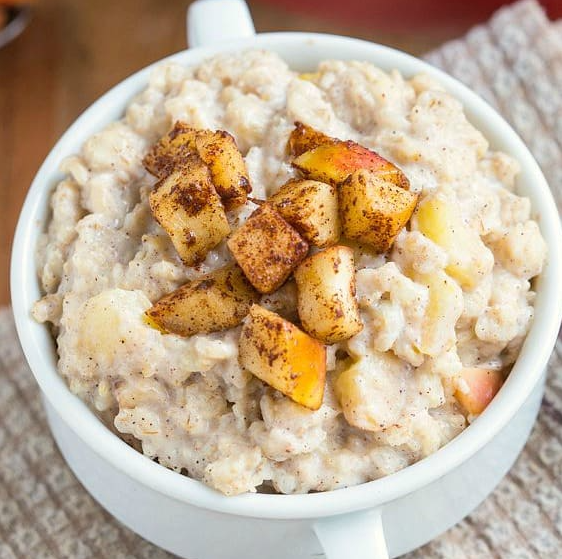
Apple Pie Overnight Oats

You don’t need to bake anything to make these apple-pie overnight oats. Apples are really good for you and can help your heart. They add crunch and sweetness, and they’re packed with fiber. Eating one serving of these oats will give you a good chunk of your daily fiber.

Ingredients:

  • 2 cups unsweetened, plain soymilk or low-fat milk
  • 1 cup old-fashioned oats
  • 2 tbsp ground flaxseeds
  • 2 tbsp natural cashew butter or peanut butter
  • ½ tsp ground cinnamon
  • 2 medium apples, finely diced, with peel on

Directions:

  1. Mix milk, oats, flaxseeds, cashew butter, and cinnamon in a bowl.
  2. Split the oat mixture into two jars or containers with lids. Put half of the diced apples on top of each.
  3. Put the jars in the fridge for at least 4 hours or overnight.

Banana Pudding Blended High Protein Overnight Oats

Don’t like the texture of oats? You can make them into pudding using a food processor or blender. These oats are inspired by banana pudding, creamy, naturally sweetened, and full of protein and fiber. This combo will keep you full for a long time. Eating a breakfast high in protein can help you control your weight because it helps you feel full and keeps your energy levels stable, according to research.

Ingredients:

  • 2 cups unsweetened, plain soymilk or low-fat milk
  • 1 cup old-fashioned oats
  • 2 scoops plain or vanilla protein powder
  • 2 small bananas, peeled
  • 2 tbsp natural almond butter or peanut butter
  • Chopped almonds, flaxseeds, banana slices, for garnish (optional)

Directions:

  1. Put milk, oats, protein powder, bananas, and almond butter in a food processor (or blender) and blend until smooth, about 1-2 minutes.
  2. Divide the oat mixture into two 16-oz jars or containers with lids. Add almonds, flaxseeds, and banana slices on top, if you like.
  3. Refrigerate for at least 4 hours or overnight.

Tropical Overnight Oats

These oats will give you a taste of the tropics. Passionfruit has a hard, pink shell and juicy fruit with tiny seeds you can eat. One passionfruit has only 18 calories, nearly 2 grams of fiber, and vitamin C. Golden berries are another tropical fruit. They’re small, round, and sour, and you can eat them straight from the plant. Golden berries also have vitamin C and fiber, and you can find them in the tropical or exotic section of your local grocery store.

Ingredients:

  • 2 cups unsweetened plain coconut milk (from carton)
  • 1 cup old-fashioned oats
  • 6 oz low-fat, less sugar mango Greek yogurt or skyr
  • 2 passion fruits, cut in half, shells discarded
  • ½ cup whole golden berries

Directions:

  1. Mix milk, oats, and Greek yogurt in a bowl until well combined.
  2. Divide the oat mixture between two 16-oz jars or containers with lids. Add half of the passionfruit and golden berries on top of each.
  3. Refrigerate for at least 4 hours or overnight.

Carrot Cake Overnight Oats

Who doesn’t love cake for breakfast? This recipe gives you the taste of carrot cake but in a healthier way — each jar has half a serving of veggies. Applesauce and raisins make it naturally sweet, so you don’t need to add sugar. Spices like cinnamon and ginger are good for you too, as they have antioxidants and can reduce inflammation.

Ingredients:

  • 2 cups unsweetened plain or vanilla coconut milk (from a carton)
  • 1 cup dry old-fashioned oats
  • ⅔ cup peeled and finely grated carrot (about 2 medium carrots)
  • ½ cup unsweetened applesauce
  • ¼ cup raisins
  • ½ teaspoon ground cinnamon
  • Optional: ⅛ teaspoon ground ginger, ⅛ teaspoon ground nutmeg
  • ¼ cup chopped raw or toasted walnuts

Directions:

  1. Mix all ingredients except walnuts in a bowl.
  2. Divide the oat mixture between two 16-oz jars or containers with lids. Sprinkle half of the walnuts on top of each jar.
  3. Refrigerate for at least 4 hours or overnight.

Matcha Steel-Cut Overnight Oats

These matcha oats will give you a boost because matcha has caffeine. But it also has L-theanine, which helps you stay calm, so you won’t feel jittery. You can use steel-cut oats instead of old-fashioned oats to make these oats. Steel-cut oats have a chewier texture. These oats are topped with canned peaches, which are affordable and last a long time on the shelf, especially when fresh peaches aren’t available.

Ingredients:

  • 2 cups unsweetened plain or vanilla soymilk
  • ½ cup steel-cut oats
  • 6 oz low-fat vanilla Greek yogurt
  • ¼ cup chia seeds
  • 1 tbsp matcha powder
  • 2 kiwis, peeled and diced
  • 1 cup no-sugar-added canned peaches in fruit juice, drained

Directions:

  1. In a mixing bowl, combine the soymilk, oats, yogurt, chia seeds, and matcha powder. Mix everything together well.
  2. Divide the oat mixture into two 16-oz jars or containers with lids.
  3. Top each jar with half of the diced kiwi and peaches.
  4. Refrigerate overnight.